NEW FEATURES VIDEO
For a quick overview of the biggest features in Corona Renderer 7, here’s the New Features video:
QUICK FACTS
- New Physical Material – Greater realism without any extra work from you, and greater compatibility with other software and worklows with mapped Metalness, a choice of Roughness or Glossiness mode, and more
- Corona PRG Clear Sky Model is the new name for the “Improved” model, and now includes Volume Effect (aerial perspective), Turbidity, Altitude, and Horizon Blur controls
- Faster! Rendering is faster thanks to calculating passes in blocks (invisibly, in most cases), optimized opacity/absorption with multiple hits, faster denoising, and a general speed up that even affects empty scenes!
- Faster!! There’s also faster opening of scenes thanks to loading textures and proxies in the background, which means you can start working with your scene even before all assets are fully loaded
- …and much more, see below for all the new features, improvements, and updates.
MAJOR FEATURES
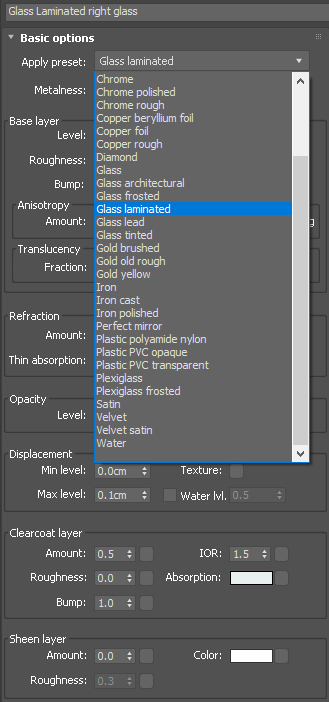
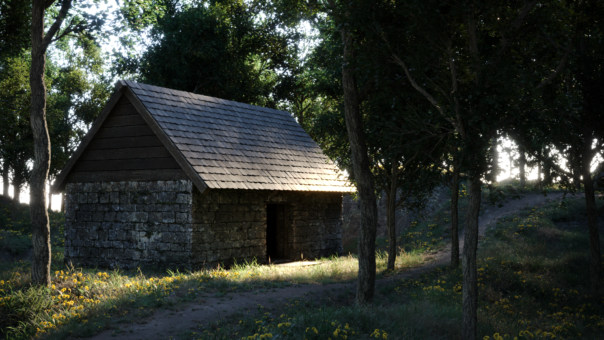
New Physical Material

A scene created using only the new Physical Material
These three words contain a whole world of improvements for you – amazing varnishes, incredible fabrics, eye popping car paints, stunning glass, and much more!
The last major update to materials was in 2016, so it was time for an overhaul here. We’ve focused on:
- Adding Clearcoat and Sheen
- Making it easier to get physically realistic results, e.g. the Diffuse model has swapped to Oren-Nayar
- Giving you 35 presets in the Physical Material itself to get you started
- Making the materials more in line with industry standards / other material formats (e.g. using Roughness by default rather than glossiness, plus optional IOR or Specular workflow, and mapped Metalness)
- Optimizing the UI and layout
Let’s go through each of those in detail!
Clearcoat
Many surfaces in the real world have some sort of coat applied over them, classic examples being varnish applied over wood, or car paint. With the Legacy Material, you would have to resort to layers to achieve this effect, which was hard to control and unsatisfying in several ways.
The Clearcoat has its own absorption layer, which will affect the color of all aspects of the base layer such as Diffuse and Reflection. Again the classic example is a coat of varnish over wood as seen in the violin scene – you can see in the image above how the base layer wood looks pale, and then looks much darker with the Clearcoat due to the absorption coloring the Base layer below it.
The new Clearcoat in the Physical Material has its own bump map, which means you can have a rough wood surface with a smooth varnish over the top of it, or add a slight ripple to the Clearcoat via its own bump independent of the rougher bump of the wood beneath.
If you want to experiment with creating your own materials using the new Physical Material, an untextured version of the violin scene shown above (and used in our New Features video) is available for free download (license details determining usage are included in the download).
Sheen
Many, if not all, fabrics exhibit a sheen effect, which arises due to the fibers of the fabric. Rather than resort to scattering actual fibers across the surface of the fabric, you can now take advantage of the Sheen parameters to add an easily controlled, fast-to-render effect that will bring your materials to life.
Greater Realism
All the changes to the Physical Material help make it easier to make sure your materials are physically realistic. The Diffuse calculations have been switched from Lambertian to Oren-Nayar, so even simple materials will look better and be more physically correct, and even the changes to the UI will give you the security of knowing that your materials are realistic.
35 Presets
Creating a brand new material was a great opportunity for us to add a list of 35 Presets, to give you quick starting points for a range of common materials. Whether you are a new user or a seasoned expert, these presets will speed up your workflow by instantly setting up the parameters the way you need them – and will also provide an easy way to learn the UI, parameters, and ways of creating materials with the new Physical Material.
Note: These don’t contain any maps of course – use the Material Library for complete set ups that include specific maps!
Improved Glass
We are using a new physical model for all kinds of glass created using the new Physical Material. This gives several improvements:
- Rough glass (i.e. with a non-zero Roughnesss, or Glossiness less than 1) now gives more realistic reflections and refractions. This does mean that even with the same values, the new glass may look different (more correct)
- Thin glass can now blur refraction as well as reflection when roughness is used (think frosted glass). It also correctly simulates bouncing within the thin glass. This applies when Roughness is greater than zero, or when Glossiness is less than 1 (since they are the inverse of each other) – the example below shows Glossiness values, to allow comparison to the Legacy Material which can’t use Roughness:
- There are no longer any issues with reflections of glass objects that have non-zero Roughness (the old Legacy Material gave incorrect results e.g. if a mirror had a Glossiness of less than 1, or if it reflected glass objects that had a Glossiness of less than 1, you might see “doubled” reflections and other unwanted results)
- Changing IOR from 1 to 1.001 no longer results in drastic change of look (previously it did, especially for high roughness values)
- Shadows from glass without caustics (“hybrid glass”) now look more realistic, closer to shadows you would expect if caustics were enabled (the shadows are darker, and more clearly defined)
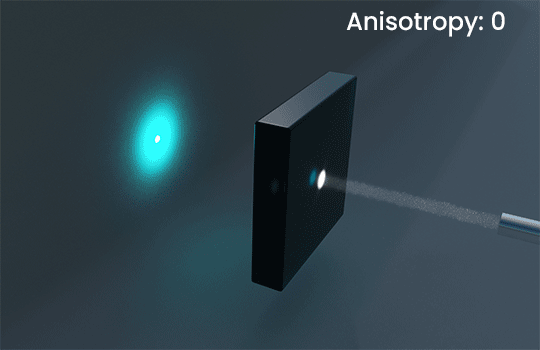
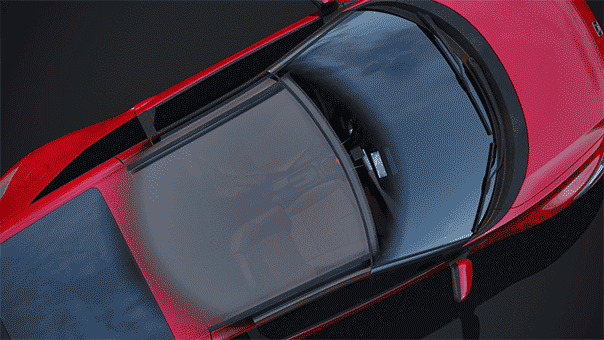
With the new Physical Material, you can now have anisotropic refraction, to go along with anisotropic reflection – something that was previously impossible:
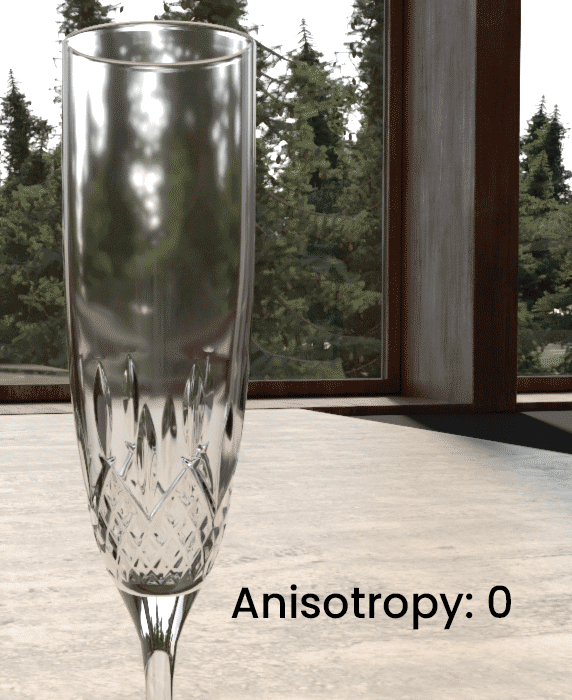
Anisotropy in refraction also correctly affects the result of caustics:
Edge Color for Metals
You can easily control the look of a metal by adjusting the Edge Color, which lets you “eyeball” the end result. This is ideal in 99% of cases, you can see the (quite subtle) effect in the comparer below:
While not needed in the majority of cases, there is also the option to use Complex IORs for metals – this is much more complex to use, since it certainly can’t be “eyeballed” or “guesstimated” and needs you to look up the values to use for a specific metal online, but the option is there if you absolutely need it. We have a helpdesk page for Complex IOR where you can learn more about it, and get some example values.
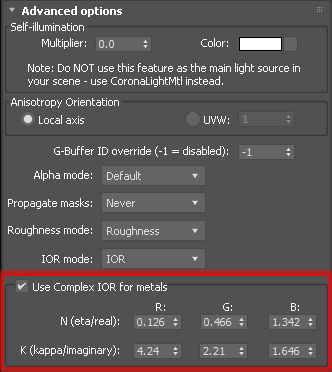
Usually, using the default Edge Color parameter is more than enough to get predictable, accurate results though!
Greater Realism
With the previous Corona Material (now renamed the Corona Legacy Material), it was very easy to come up with non-physical results. For example, it was all too easy to create a “plasti-metal” material, which simply was not possible in the real world.
Industry Standards
- A material is now defined as either Metal, or Non-metal. This ensures you only have access to the correct, industry standard parameters for that kind of material.
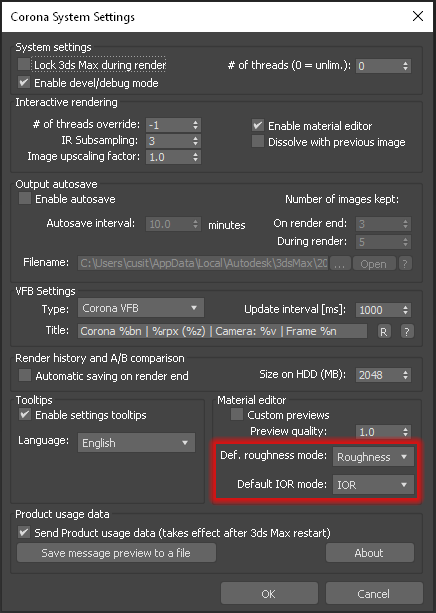
- Roughness is now the default, rather than Glossiness. For ease of use, each individual Physical Material can be set to Glossiness mode if required (e.g. if you want to easily re-use existing bitmaps that you have set up to work with Glossiness). You can also set the preference for Roughness or Glossiness as the default at the system level.
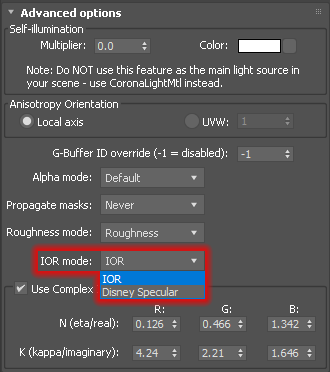
- Although IOR is the default, you can swap each material to Specular instead to make use of Specular maps without having to convert them. You can also set the preference for IOR or Specular mode as the default at the system level.
Improved Corona Converter
Of course, we can’t have an entirely new material without having major updates to the Corona Converter. This now converts everything to the default Corona Physical Material to ensure you are getting the best, most up to date materials in your scenes.
(As a note, the only benefit the Legacy Material has is “looking 100% identical to an existing scene already created using the old Corona Material” – so if you are converting a new scene from V-Ray or other engine, there is no benefit converting to the Legacy Material).
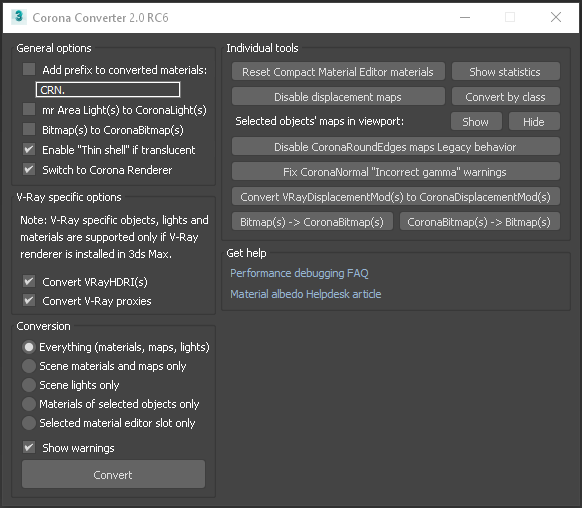
It adds the option to treat all materials with Translucency in the Legacy Material as materials with Thin Shell mode enabled in the Physical Material. This improves conversion of scenes where translucency effects are frequently used, e.g. with vegetation.
When reporting problematic materials to the maxscript listener, each material is now printed on a separate line to improve readability.
We also fixed a problem which sometimes occurred during conversion of V-Ray lights to Corona lights, added a better warning when V-Ray is not installed, and removed “Fix Bitmaps using “Mono Channel Output” used as opacity maps” button as this now already works without the need for a specific button.
Faster, Faster, Faster!
We have a set of optimizations and speed ups that will improve render times, and your workflow too. All of these will combine and add up, meaning that rendering is faster by 6 to 50% depending on the scene. For the technically curious, we’ve split out the various separate improvements below and isolated the speed improvements from just those updates:
Calculating a pass in 32 x 32 pixel blocks
This one gives you an overall 5% speedup on average, up to 15% in some scenes. We’ve also implemented it in a way that won’t disrupt your viewing of the scene – the blocks are not used at all when using IR for example, and in regular final rendering they only take effect after the 5th pass.
When the blocks are being used, Corona will still complete an entire pass over the whole image as before, so you won’t be waiting for one “block” to render to final quality before moving on to the next (so, this is not like bucket rendering) – it’s simply that we process each pass in 32×32 pixel blocks.
The only time you will be likely to notice them is when using DR, backburner, or rendering via the command line, where they are used immediately rather than after 5 passes like regular final rendering. For the curious, we’ve isolated an example below so you can see what we mean:
You can see an example of the speed up achieved by rendering in blocks in the images below – things to note:
- We left Denoising disabled, so that its speedup did not play a part in these results. If we’d used denoising, we could have rendered for less passes.
- The other speedups, such as Faster Transparency / Absorption will also be in effect here, though the difference should be slight (just the vegetation outside the window at most)
- We did not convert the materials, they are the Legacy material in both cases
- It’s a fairly “regular” scene with nothing unusual about it, and not tailored in any way to exploit any rendering speed ups – just a scene like you might create in your daily work!
Faster Denoising
Our own High Quality denoiser shows a 20% speed ups on average, up to an 60% in some extreme cases.
Faster Transparency / Absorption
The technical term is “optimization of multiple transparent hits resolving”, but what you need to know is that you can see up to a 50% speed up in scenes with opacity used in materials (most likely around 30% on average), especially where those materials overlap one another, or when absorption is used e.g. for SSS or Volumetrics.
In the example below, we rendered for a set 40 passes – we’ve left denoising off (since it has it’s own speed boost), and we have also internally disabled the 32×32 pixel blocks so that it has no effect on the speed up (in other words, there would be even more of a speed up if we’d used the 32×32 pixel blocks and denoising!)
Quick note – this applies to transparency and absorption, but does not apply to translucency which will not show a speed up; also, transparency with “Clip” enabled will show much less of a speed up.
Faster Scene Opening
CoronaBitmap now loads texture files in the background (called asynchronous loading) after the scene has been opened and while you are already working with the scene. This reduces scene opening times by 35% on average, and up to 73% in some cases.
We screen captured opening a test scene that used many proxies and lots of large textures (played back at super-speed since there isn’t anything to see, but the stopwatch counters show the actual elapsed time for each):
To go along with that, Corona will also load Corona Proxies in the background after a scene has opened, which gives an average 12% speed up, up to 32% in some cases.
Both speed ups will stack, so a scene with lots of large texture files that also has lots of proxies will see both speed ups. As a note, we took these measurements from real world scenes that we have received from our users (and not from test scenes like the one in the video!)
Remember – ALL THESE SPEED UPS ADD TOGETHER!
We’ve broken down the speed ups into the individual areas of improvement for this write up, but of course they all work together so will add up for your scenes. In a scene with heavy use of transparency or absorption, that uses many large textures and many proxies, you will get all of those speed ups combined with the block rendering speed up, to give the overall render speed up for your scene.
Material Library Updates
We’ve updated the Material Library to include a new category, Masonry, and we’ve updated the Metals and Wood categories to add some new materials based on the Physical Material (the materials that were there already remain based on the Legacy Material).
We’ve also converted some of the previously existing materials to use the new Physical Material in place of the Legacy Material, with the addition of things such as sheen to fabrics, etc. These are the Carpets, Flooring, Concrete, and Ceramic Tiles categories – note that this may result in a slightly different visual result when applying the new version from the Library, but that existing scenes which used the previous Legacy Material versions will be unaffected (unless you convert them yourself, of course!)
Updates to the Corona Sky
Previously called the “Improved” model, this now has its final official name – the PRG Clear Sky Model. To go along with the name change, it also has very powerful new functionality!
Volume Effect
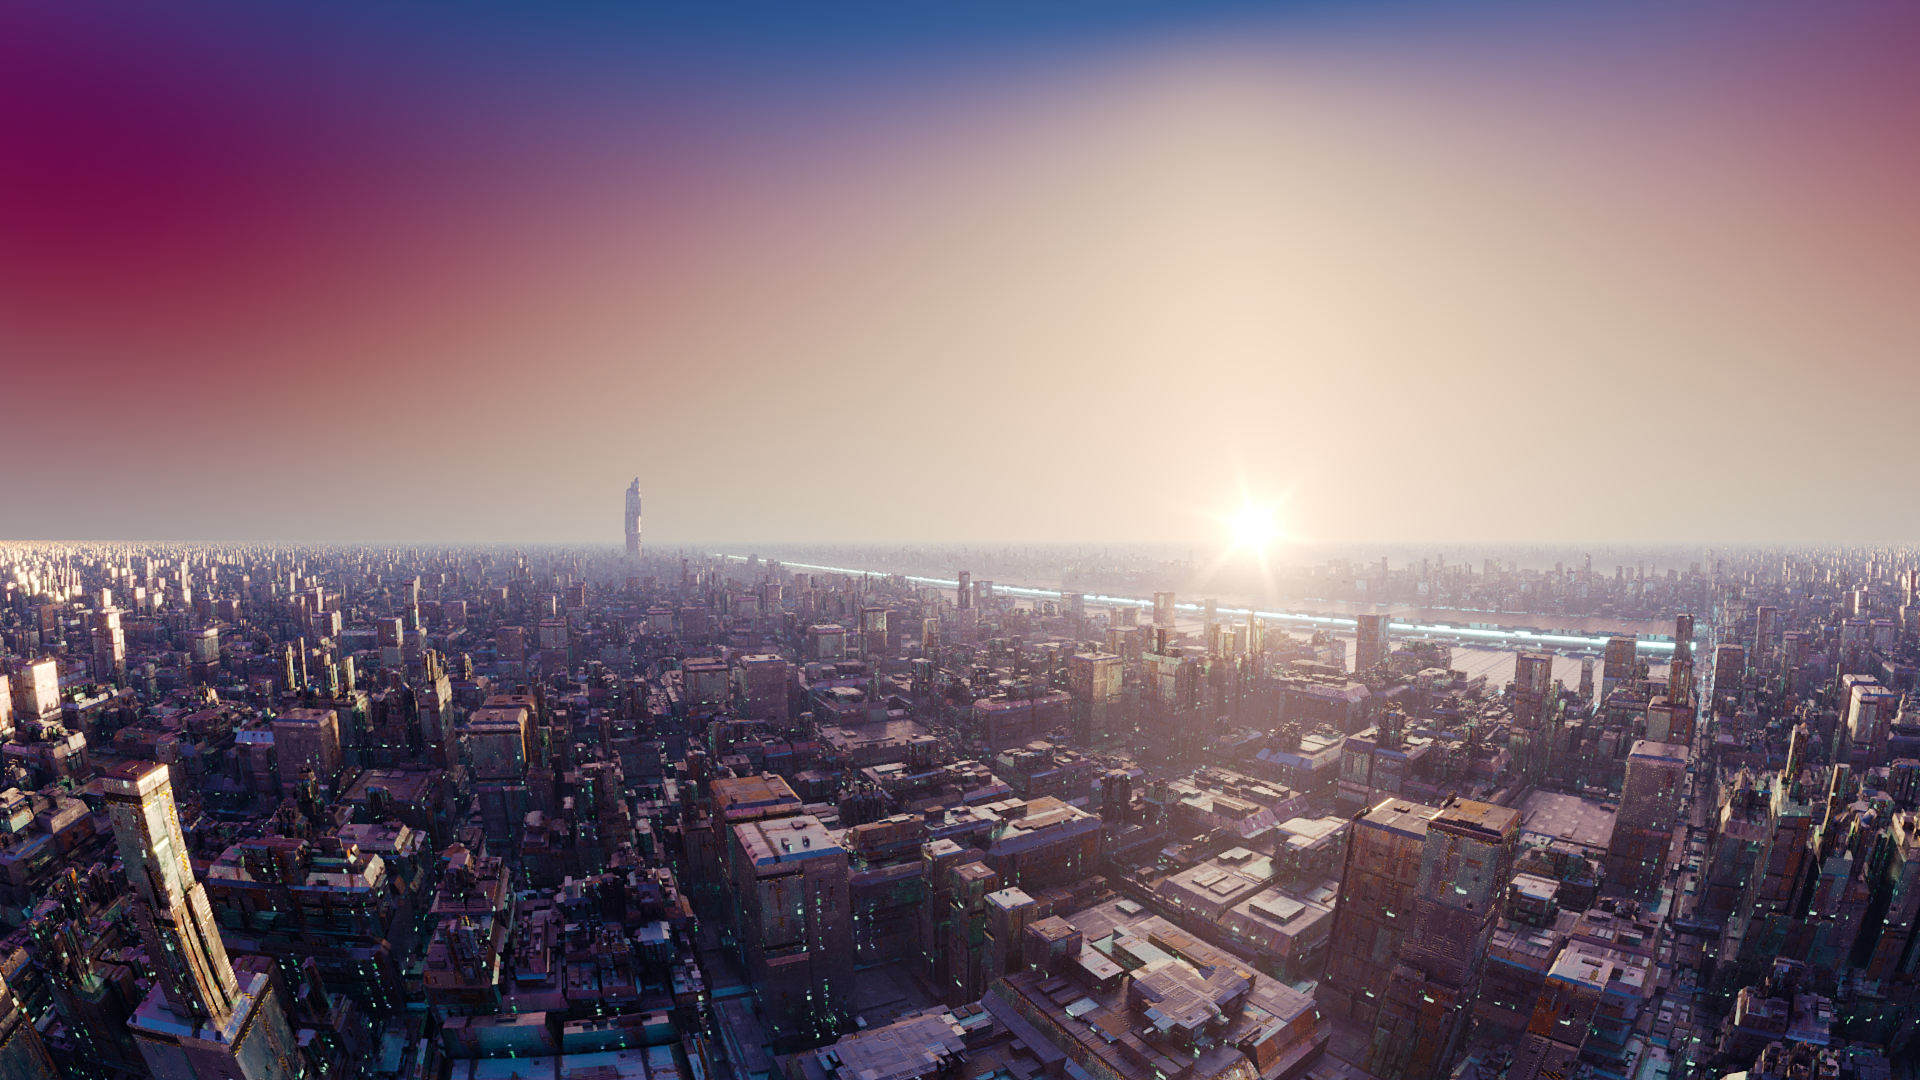
With one click on a checkbox, you can enable a Volume Effect (often called aerial perspective), which will make more distant objects take on more of the sky color, as if obscured by the atmosphere. You can easily control the strength of this effect via a single value, and the effect is ideal for situations such as sweeping landscape shots, or high aerial views of a cityscape.
Previously, effects like this were only possible using the Corona Volume material, usually in the Global Environment slot – but this was more complex to set up, could have a significant impact on render time, and rarely achieved the desired look.
Below we kept everything the same and just varied the strength of the volume effect:
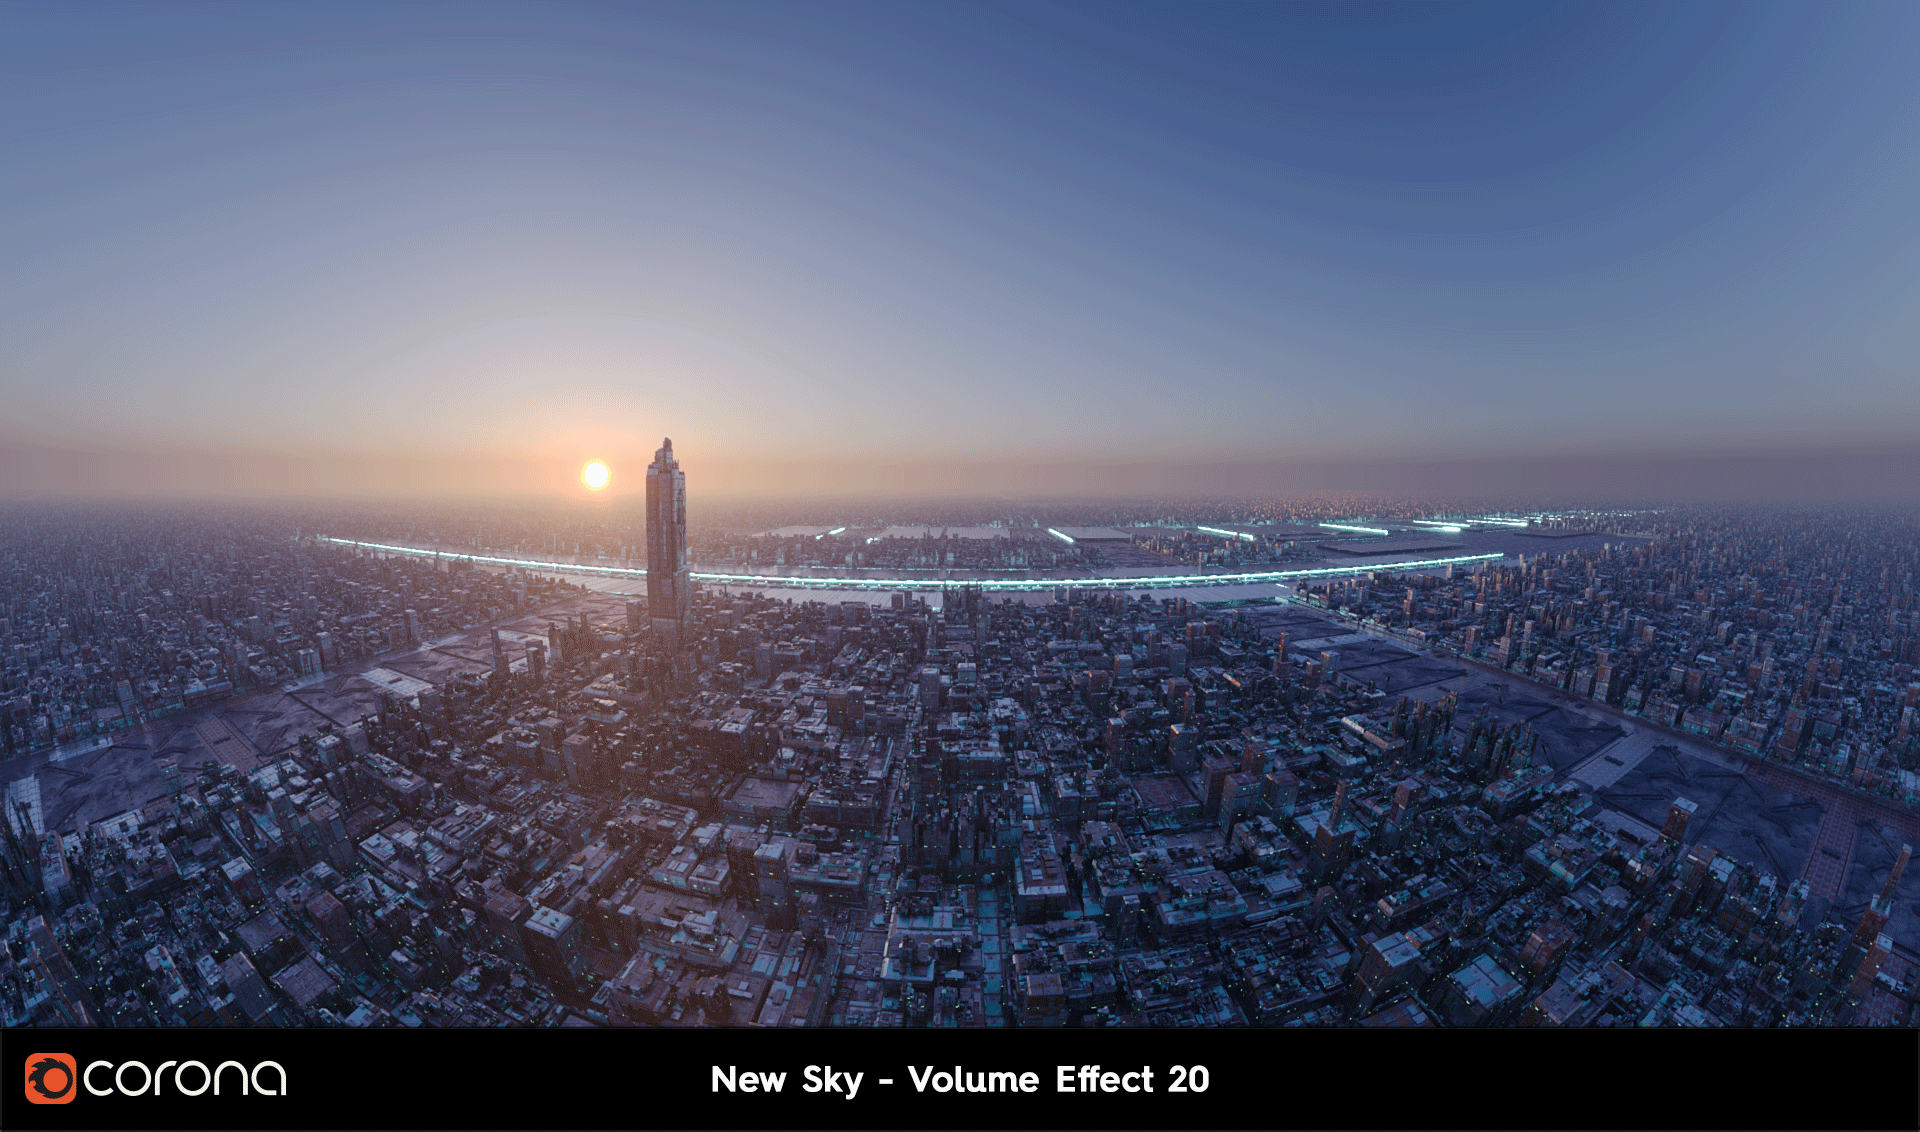
As an example, in the image below we see the same scene rendered to 5% noise with no effect, the new volume effect, a basic Corona Volume shader in the Global Environment, and a Corona Volume shader affected by distance from the camera in the Global Environment:

As you can see, using the new Volume Effect not only looks best, but is the fastest of all the options. Because Noise was used as the target, it is even faster than the one with no effect at all since items in the distance quickly resolve to a simple single color (in terms of rays/s, the new Volume Effect is second highest). This makes Noise the recommended target (or simply render for less Passes / a shorter Time, since the image will clean up faster).
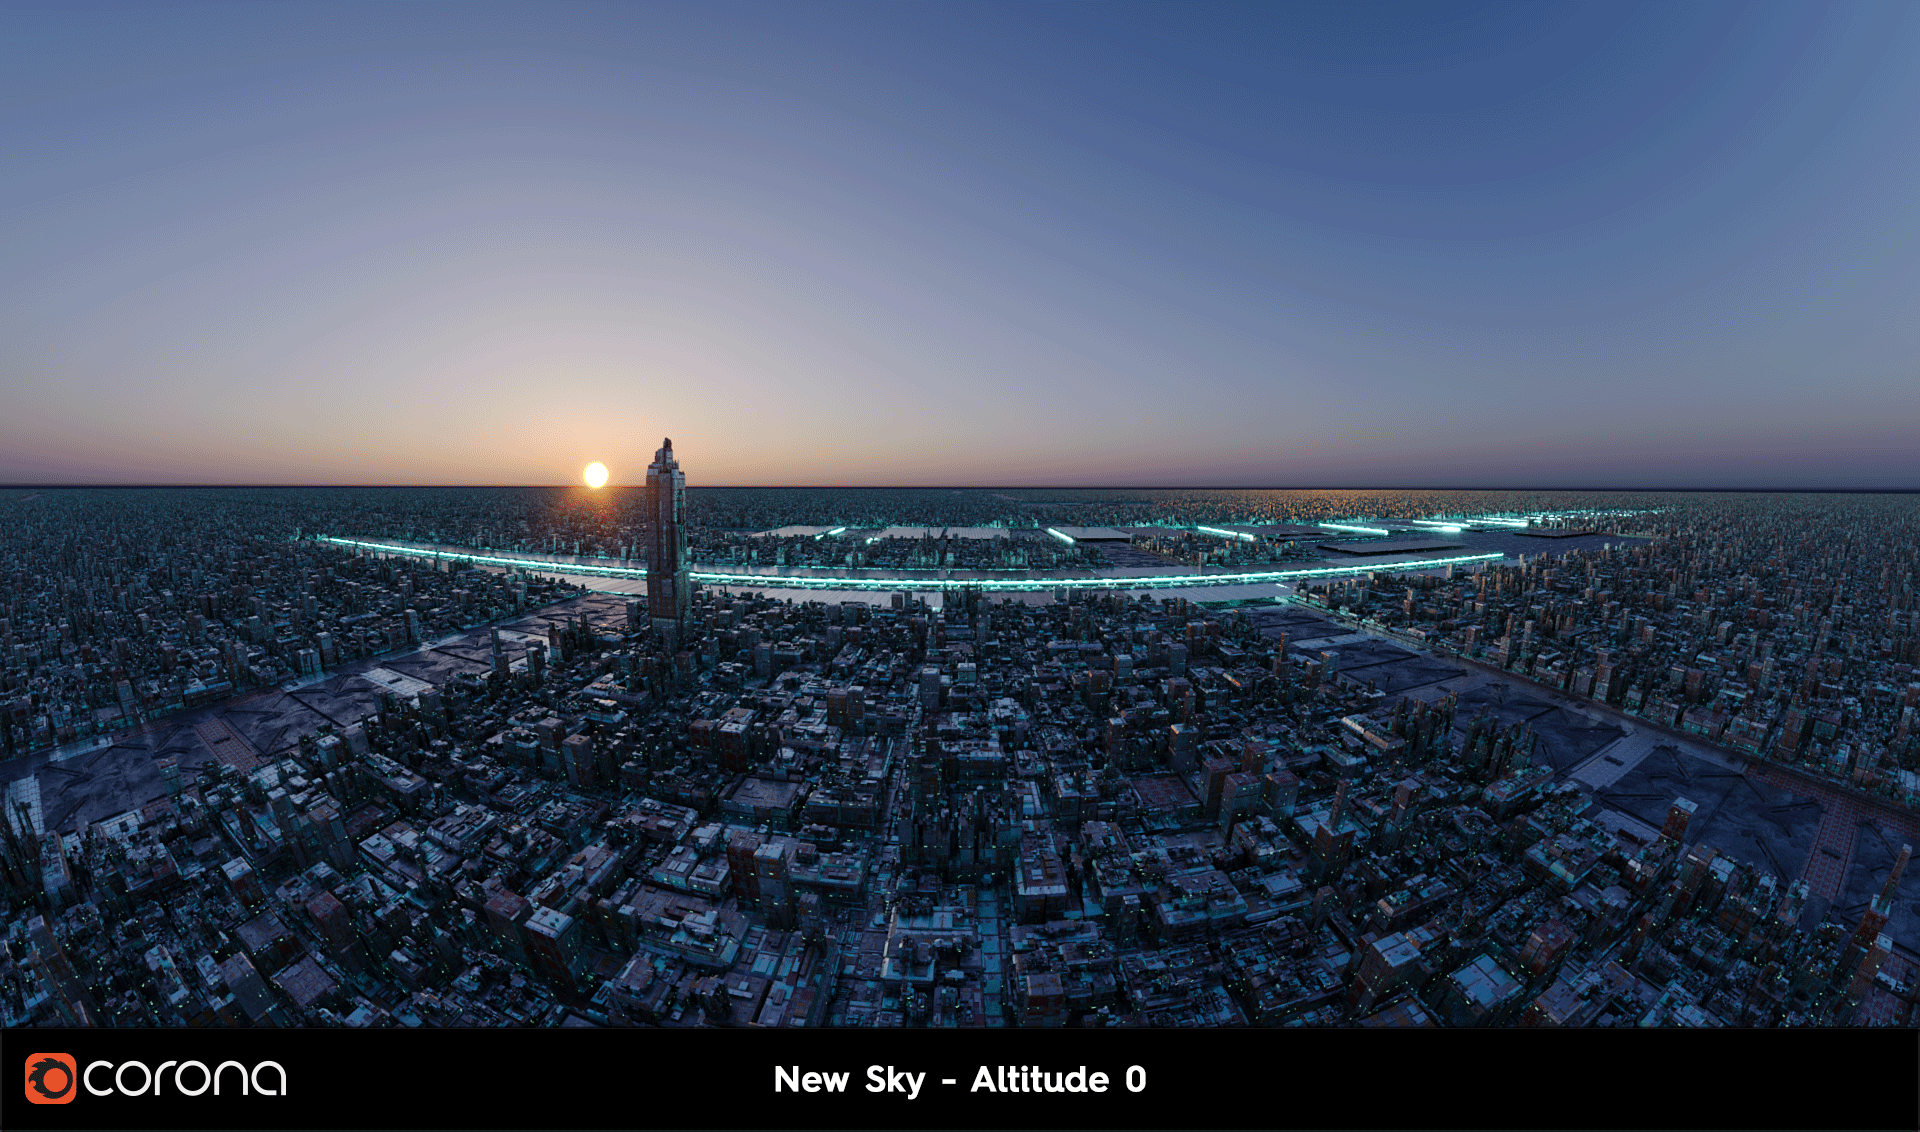
Altitude
You can now get correct results for the atmosphere whether your scene is at sea level, or on top of Mount Everest, thanks to the new Altitude parameter, allowing you to define how high the camera is in the atmosphere.
In the example below, we kept everything the same and only changed the Altitude parameter – of course, normally you would also animate the camera height in the scene too, so this example is like the cityscape itself has been built at different altitudes:
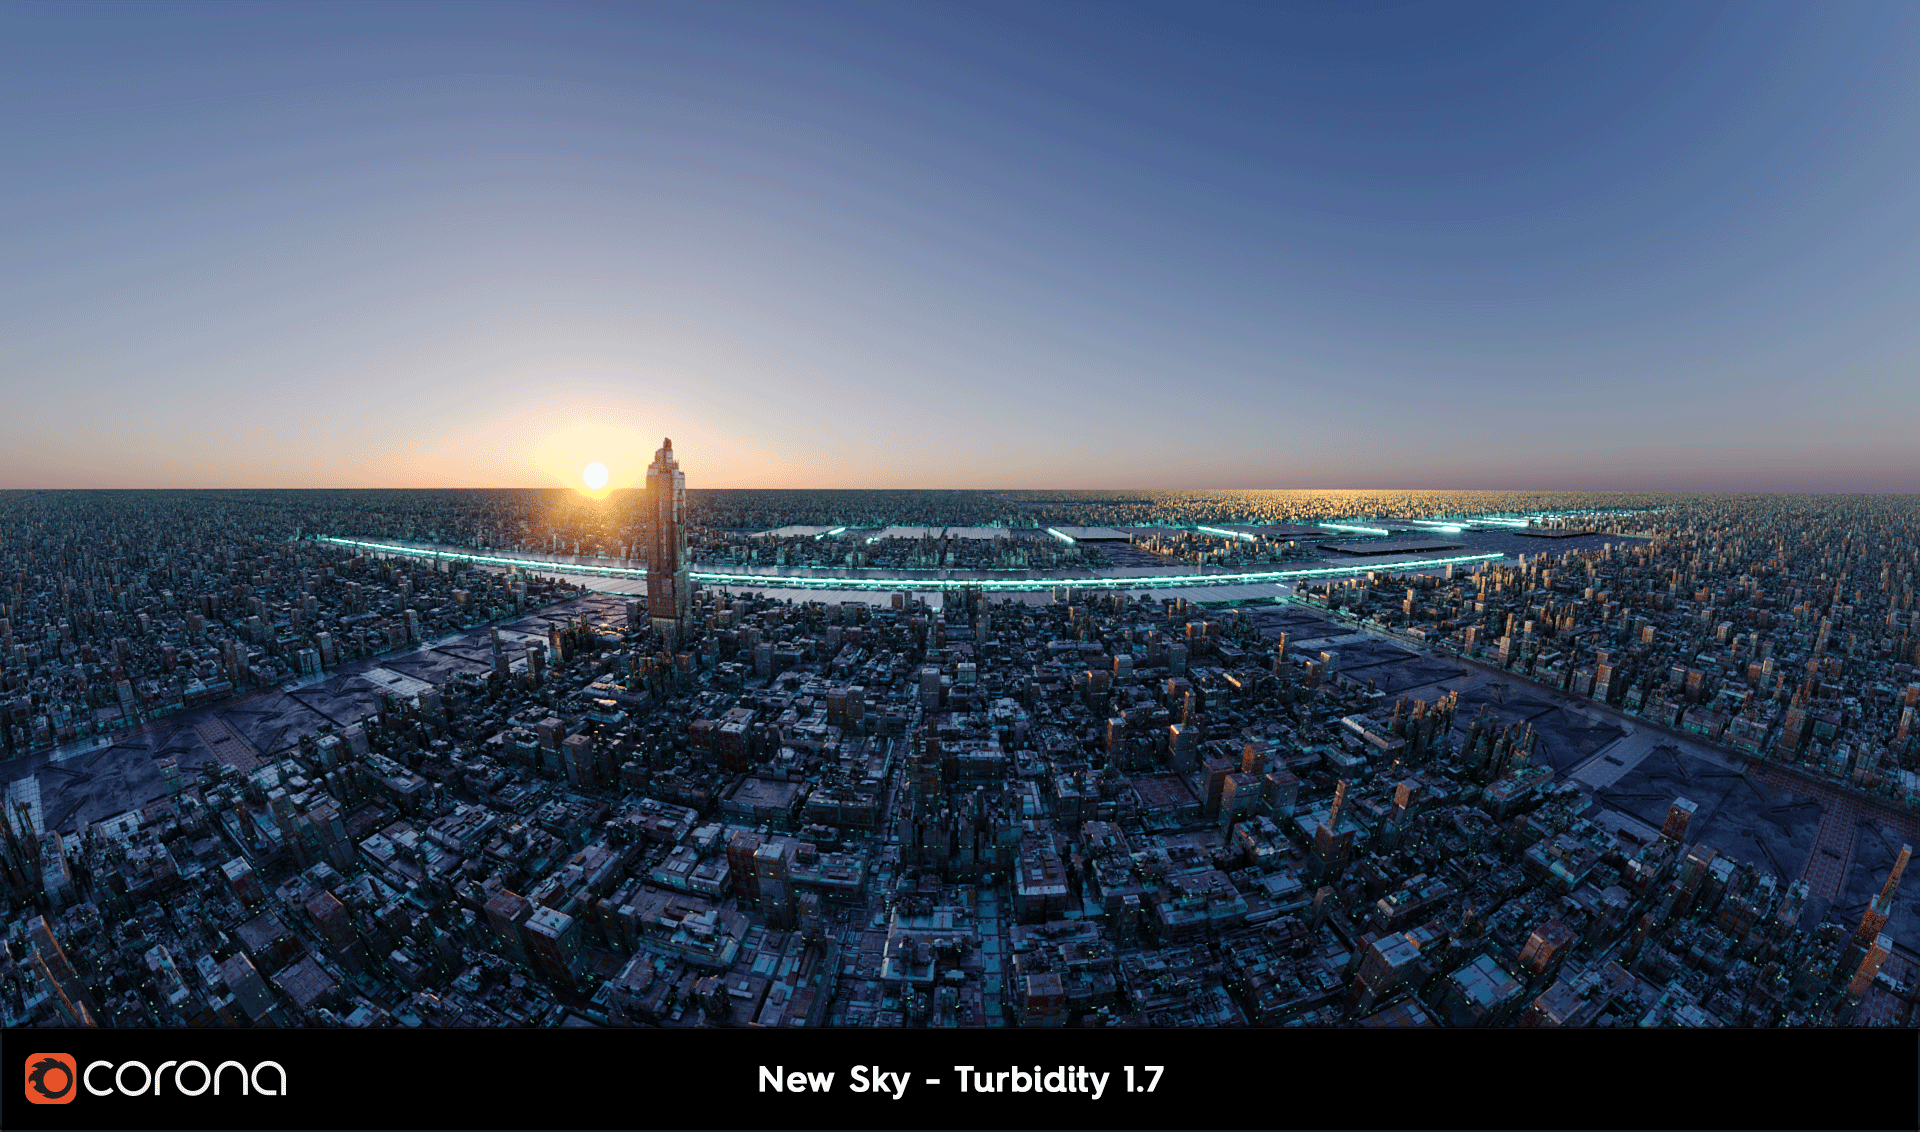
Turbidity
The PRG Clear Sky model has been updated to include Turbidity, so you can determine whether your lighting is from a clear or cloudy sky. This works the same as in the older models for the sky.
Again, so you can see the effect the parameter has on the scene, we’ve kept everything the same and simply varied the Turbidity:
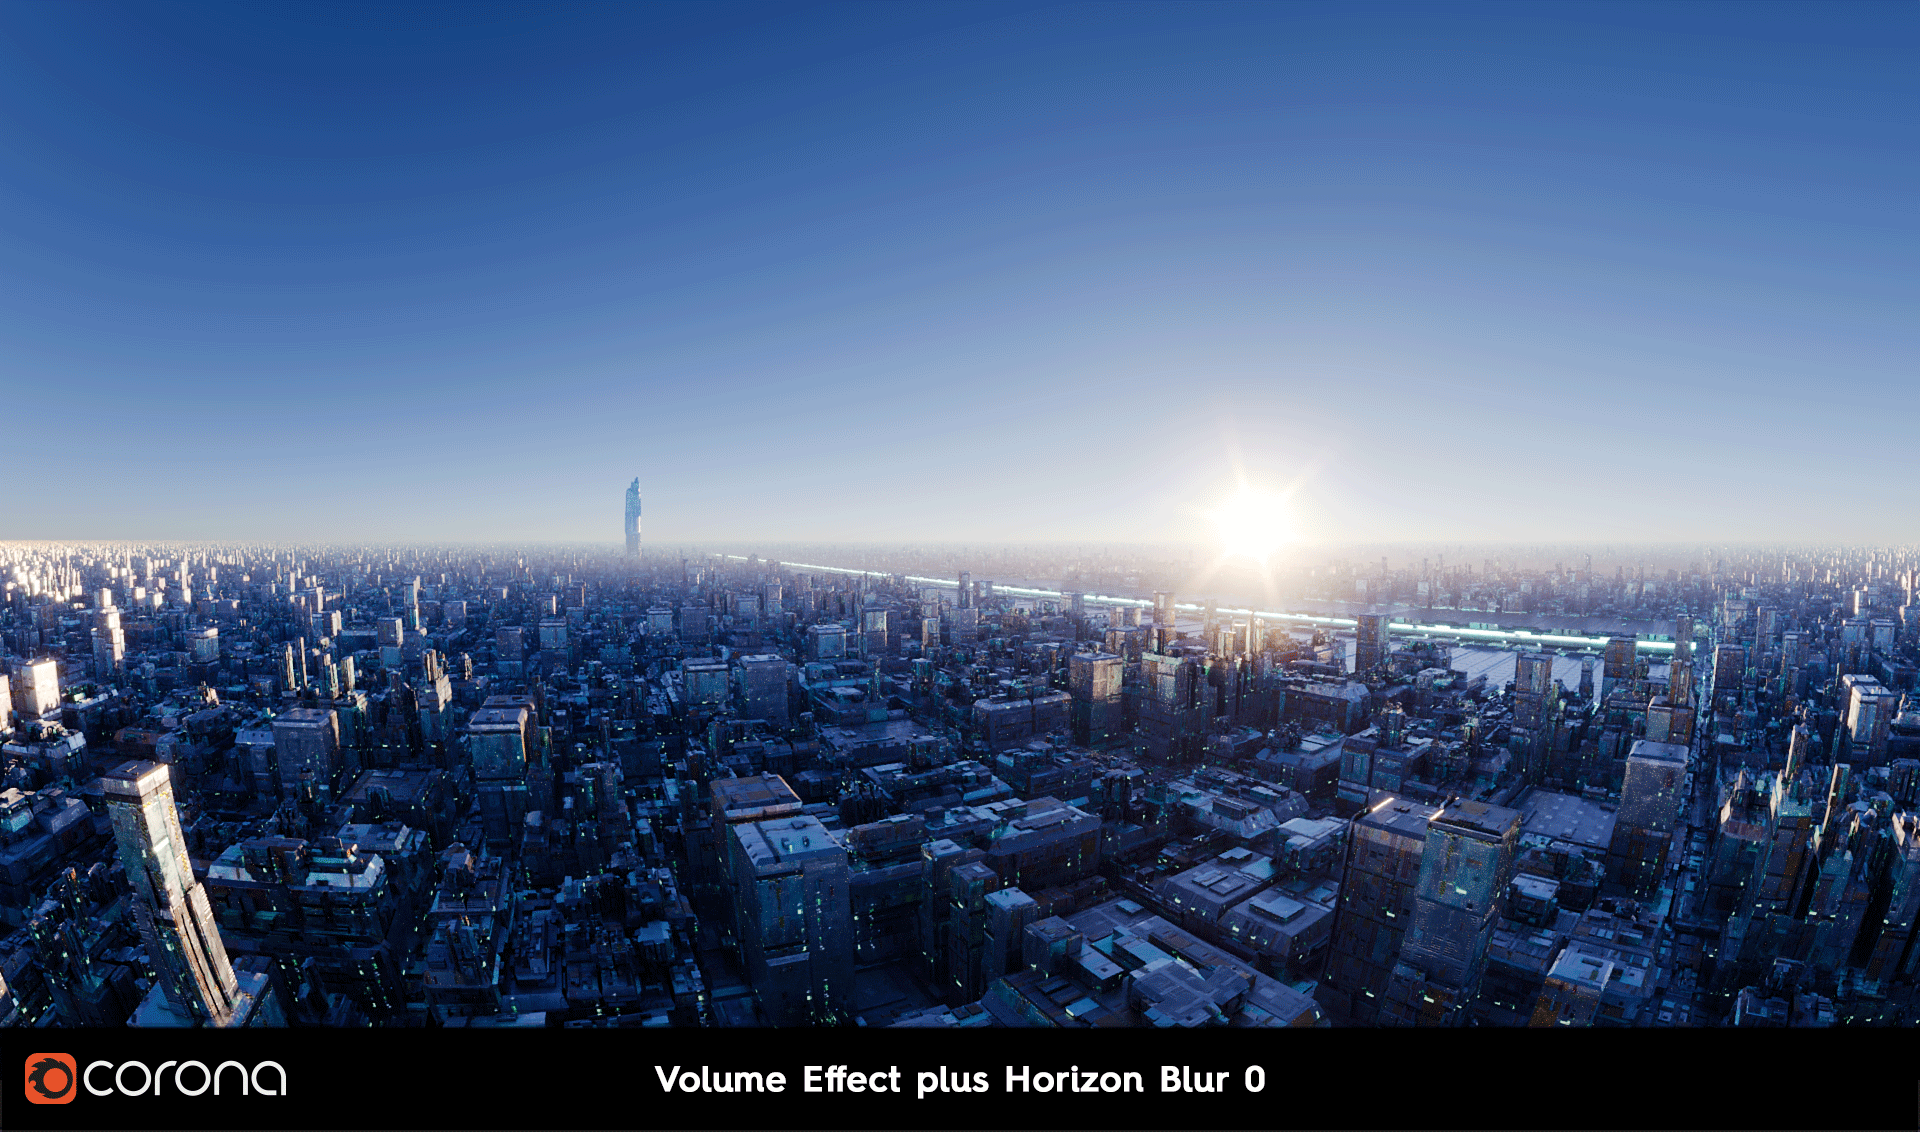
Horizon Blur
We’ve reworked this when the new Volume Effect is enabled, to ensure they work well together (when the Volume Effect is not enabled, it works just as it did in previous versions of the Sky).
Loading scenes from previous versions
Note that while Corona 7 will give a similar look as Corona 6 with the default values for Turbidity and Altitude, there may still be some visual differences due to the overall changes to the sky model. The benefit is that now you can dramatically change how the sky looks using those parameters, for clearer or more overcast days (Turbidity), for needle skyscapers or mountain top cabins (Altitude), and for a physically realistic aerial perspective (Volume Effect).
Side Note:
The Sky is based on real physical data, and getting physically realistic results is normally what you want. For those times when you want to be purely artistic though, try turning off the “Affected by Sky” in the Ground Color and then adjust the Ground Color. Playing with the other parameters can give some interesting results, like below where a high Turbidity, Altitude and Horizon Blur were used along with the new Volume Effect:
SMALLER IMPROVEMENTS
- Added support for Max 2022 (This was also backported to Corona Renderer 6 Hotfix 2)
- 2.5D Displacement ImprovedThe problems and issues with 2.5D Displacement have been corrected. With that done and the new displacement working as intended (using less memory and giving better results than the legacy displacement), the legacy displacement has been removed.Also, Fast mode is supported in the CoronaRoundEdges map.
Open full size version to see the full details
Open full size version to see the full details
- Fixes to the Global Volumetric EnvironmentThe Global medium is always calculated as a sphere, and this sphere is now always centered on the camera (previously, this would depend on the origin of any given ray, meaning that the result from the Global medium could look different in a refraction, reflection, when calculated from a local volumetric material, etc.).This gives more predictable and consistent behavior such as:– A CoronaVolumeGrid bounding box could be visible when rendered inside a Global Volume material. This is now much less likely to happen.
– A border around the scene might be visible when using a Global Volume material
– The CoronaVolumeMaterial would cast incorrect shadows when set as a Global Volume material
- Fixes to many overlapping volumetricsPreviously this could cause artefacts with just tens of overlapping volumetric objects, and this has been improved so that the limit is now much higher (into the thousands) and you should not run into this issue.
- In Corona Scatter, the parameter limiting the number of instances displayed in the viewport is now colored when the limit gets exceeded (going from green to yellow to red)
- The Corona Scatter UI was polished and condensed
- Enabled PhoenixFD Foam and Particle maps in the material editor
- The CoronaDistance map can now take the origin of any object as input (e.g. a camera)This makes it easier than ever to achieve more effects using the Distance map. For example, in Corona Scatter you can now define the density falloff based on distance from the camera’s origin, or have automatic cutaways based on distance to camera e.g. for flying through walls and other solid objects, and more.While the camera is likely the most common choice, the Distance map now works with any object in 3ds Max – see what uses you can come up with for this!Please note that due to 3ds Max limitations, the camera can only be added using the “+” button in the Distance map interface.
Distance to camera map used in the Opacity slot of car material
- Scenes far from the origin now render correctlyIn earlier versions of Corona, if a scene was set up far from the origin (that is, far from the 0,0,0 coordinates in the Max scene), this could cause rendering errors, such as refractions and reflections looking incorrect, light leaks, and similar. This has been corrected in Corona Renderer 7 – please note that “far from origin” depends on the scale of the scene, so if you are rendering a scene like a room “far” could mean 10km away from the origin, but if you are rendering some coins on a table, “far” could be a much smaller distance away.You can see two comparers below demonstrating the difference (and yes, the Corona 7 example has both images looking exactly the same – that’s what the fix is all about!)
- Updated the Intel Open Image Denoiser to version 1.4.1This fixes some bugs, especially the denoiser adding “ghosts” of objects that should not be visible due to lack of lighting, fixes some crashes when denoising certain resolutions, and brings some optimizations too.
- Updated the OptiX (NVIDIA GPU AI denoiser) to version 6.5.0This makes all the OptiX files part of the regular Corona installer, requiring no additional download. Note: This now requires NVIDIA GPU driver 436.02 or later, though this brings no change in supported GPUs and should still work with Maxwell and later.
- Updated embree to version 3.13.0 – various small bugfixes and optimizations
- When a Corona LightMaterial uses displacement, lighting is now calculated from the displaced geometry rather than the non-displaced geometry. This gives more accurate and expected results (but may lead to longer parsing times).
- Added options for propagation to some render elements (Mask, ID, Wire color, Zdepth, Texamap)
- Actions on the Corona Toolbar have been renamed and reordered so that they are more unifiedThis will only take effect after the deletion of the toolbar in Main Menu > Customize User Interface > Toolbars, or for new Corona installs.
- Removed old Corona usermacrosThis means that user-defined menu entries / quad menu entries / toolbar items which used those macros will no longer work. They can be safely removed from the UI and replaced by entries executing actions exported by our C++ action system (available since Corona 6), which are better integrated into 3ds Max.
- CoronaBitmap now automatically removes NaNs and INFs from input images
- Added displaced primitives measure to the VFB stats tabTo go along with this, a new render stamp option has also been added for displacement primitives, %sd, and displacement primitives are also published in maxscript with getStatistic(15).
- Added maxscript function to bake LightMix settings into the scene (same as clicking the corresponding button in VFB) – CoronaRenderer.CoronaFp.bakeLightMix
- Denoising time was added to the render stamp, as %ptd
- Added a warning when a scene previously saved in a stable release version is about to be overwritten from a daily build version.This is because trying to load a scene saved in a newer version (the daily build) into a previous version can cause many problems, and this warning should help prevent overwriting a production scene while experimenting with daily builds.Please note that we can’t cancel the 3ds Max saving process, so the warning offers a chance to backup the original save to another location – this will give you a copy of the scene, still usable in earlier versions of Corona (but the currently open scene will still be overwritten with the latest daily build version).
- Added support for Ornatrix v7 (earlier versions are no longer supported), and added support for rendering newer Ornatrix objects
- Removed the VCM, VPL, PPM and LightTracer algorithms
- Corona Uninstaller now removes installation information from the Registry
- Added an error window which is shown when the Uninstaller fails to restart in an elevated mode
BUG FIXES
Crash Fixes
- Fixed crash when Falloff Map with Fresnel type and World-Z axis direction is applied to refraction
- Fixed DR being stuck when rendering second frame of an animation
- Fixed crashes on the second rendering of a scene with some specific material configurations
- Fixed issue where having Norwegian locale lead to 3ds Max crashing at startup
- Fixed bug in light solver precomputation that caused a crash in IR
- Fixed crash in IR when deleting an object that is being instanced by Corona Scatter
- Fixed possible crashes in Corona Scatter when some scattered instances get scaled to zero while using collision avoidance.
- Fixed crash in the Aperture dialog of Bloom&Glare when it is destroyed and update is still running
- Fixed crash relating to using map hierarchy with multiple Falloff textures connected to each other
- Fixed Corona Scatter crash in cases of spline scattering with zero frequency set to models
- Fixed Bad Allocation exception/crash in 2.5D Displacement for an extreme number of vertices
- Fixed occasional crashes when rendering the Corona Layered material
- Fixed crash caused by memory overflow when rendering media
- Fixed crashes in some cases when bump map is evaluated to NaNs
- Fixed crash during scene parsing when using the Pro Optimizer modifier
- Fixed rare crash caused by rounding errors when evaluating a texture map for a given pixel
- Fixed crash when the Corona Improved Color Picker is launched from the maxscript colorPickerDlg function
- Fixed crash when a Falloff map in Fresnel mode is connected to an IOR slot of any material through another map (NOTE: Falloff maps in Fresnel mode are not supported in the IOR slot by Corona, and doing this will trigger a warning and the material will be rendered as if nothing was connected to the IOR slot)
- Fixed crash during 3ds Max startup when a Corona licensing log file cannot be opened for some reason
- Fixed possible crashes occurring when a VRayBitmap is plugged in as a density map to Corona Scatter
Scatter Fixes
- Fixed Scatter missing an update in IR, causing “popping” while scrubbing on the timeline
- Fixed object list spinners in Corona Scatter to show correct values in cases where they are animated and time on the timeline changes
- Fixed Corona Scatter not to cause repetitive restarting of V-Ray GPU IPR when a scatter object gets disabled.
General Fixes
- Fixed scene parsing taking longer for each frame in an animation (note: does not fix prolonged geometry parsing, this will be addressed in the future)
- Fixed Alpha channel being saved as black when Sharpening/Blurring is enabled (PNG, TIF, TGA)
- Fixed artifacts in the bloom & glare effect in some cases with very bright lights
- Fixed an issue in the CoronaDisplacementMod where the displacement map was not taken from the material even if it was requested
- Fixed bug where displacement was removed even if override material was off, and added preservation of displacement from layered material
- Fixed freeze when removing items from Distance maps
- Fixed NaNs in certain scenes by enforcing minimal focal distance in camera
- Fixed the image texture cache, which improves memory usage when the same image is referenced multiple times using different file paths (e.g. when symlinks are involved)
- Corona Standalone now gives a more relevant error message when trying to load a file from an unsupported version
- Fixed Falloff map built-in color mixing
- Fixed CIE to correctly apply Bloom&Glare in cubemap panoramic renders
- Fixed rare issue where Bloom&Glare might not be updated in the VFB
- Fixed LEGION_STOP in a scene with falloff + RGB multiply maps combination
- Fixed “No sockets could be bound” DR failure
- Fixed memory leak when rendering hair
- Fixed “Reset to Default” button in the pop-up window that warned users that not all logical cores were used during rendering – until now it did not work as expected during Interactive Rendering
- Fixed possible NaNs rendering Skin and Hair materials
- Fixed problems with NaNs caused by some scenes containing a degenerated matrix (e.g. an object that has been scaled to have zero scale in at least one axis)
- Improved the CoronaNormal tooltip for the “Add gamma to input” checkbox
- Fixed “connection failed” issue when using “search on LAN” after “search LAN” in Distributed Rendering
- Corona Converter & Proxy Exporter scripts are now saved to Program Files/Corona to make sure we do not mix scripts from different versions when using multiloaders – read more
- Fixed environment mapping type being changed when converting from CoronaBitmap to 3ds Max Bitmap
- Fixed DRServer in command line mode ignoring output being redirected to a file
- Fixed some rendering artefacts caused by infinite values in textures (e.g. EXR)
- Fixed some entries in viewport right click menu being disabled the first time this menu is opened in a 3ds Max session
- Added a tooltip to the randomization mode of the MultiMap and UVWRandomizer mode, explaining that the “Instance” randomization is based on the node name and will change when the node is renamed
- Added warning when a Corona Proxy contains corrupted normals which cause it to render differently depending on whether the “Keep in RAM” checkbox is enabled
- Updated EULA (both in installer & pdf in daily builds folder) to version XV – Only cosmetic changes, saying explicitly that we’re part of the Chaos Group